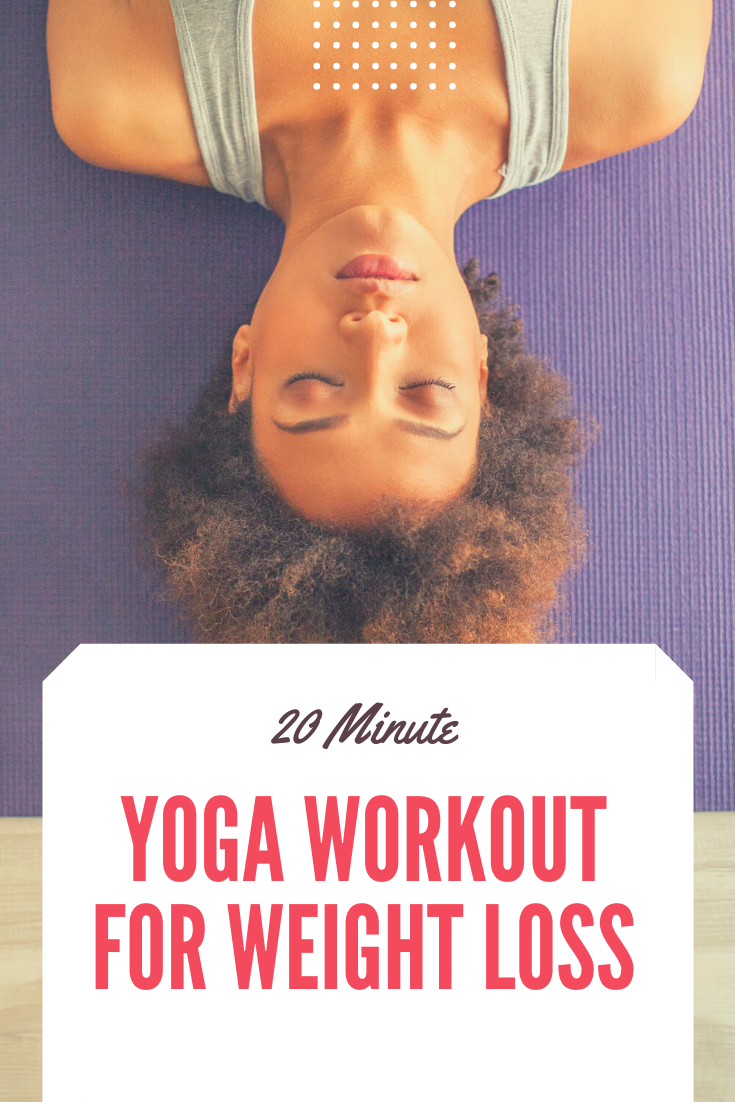
20 Minute Yoga Workout For Weight Loss
yoga workout for weight loss will also help with energy levels and flexibility, giving the body a renewed sense of purpose and the extra energy to burn more calories.
Who is the workout for?
- Complete beginners
- People looking to improve their flexibility
- People looking to use yoga to lose weight
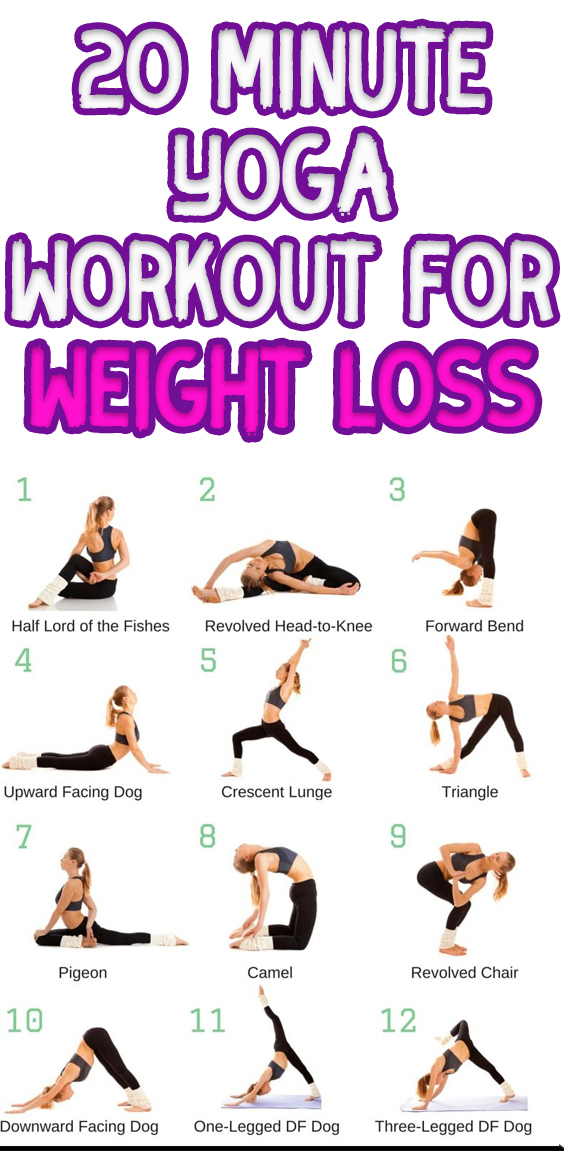
.Here is an introduction into the yoga poses for weight loss along with instructions and tips on how to do them.
-
Boat Pose (Navasana)

Slowly raise your legs up to a 45-degree angle using your arms to help you balance. Once you feel balanced and steady enough, slowly raise your arms to the outside of the knees.
Hold for 30 seconds. Work towards holding this position for a full minute.
-
Plank Pose (Phalakasana)

Firmly grip the mat, round the shoulders and upper back, and keep your butt in line with the rest of your body. Don’t let your body sag at all. Stay firm and tight, and the abs will do all the work for you!
Hold for 30 seconds. Work up to holding it for 2 minutes.
-
Bridge Variation (Setu Bandha Sarvangasana)

Begin by laying flat on the ground with your knees bent and heels touching your butt. Use your glutes and core to lift yourself up and balance on the feet and shoulders.
Reach your arms underneath you and adjust the shoulders so that you can raise yourself higher. Slowly lift up your right leg and hold. Make sure your left knee is at a 90-degree angle.
Hold for 30 seconds. Perform on both sides.
-
Side Plank Variation (Vasisthasana)

Begin in side plank pose with your left hand on the mat directly beneath your left shoulder and your feet at an angle. Slowly reach your right leg up to your right arm. Grab your toes if you can while keeping the right leg straight.
This requires a lot of flexibility in the legs. If you can’t straighten the leg, try bending your knee slightly.
-
Superman Pose (Viparita Shalabhasana)

Gently raise your head, chest, arms, and feet up at the same time. Your lower belly and hips should remain flat on the ground. Raise them up as high as you can and hold. Your gaze should be straight ahead of you.
Hold for 30 seconds. Try to work up to holding it for up to 1 minute.
If you are tired of feeling heavy and in pain from your extra weight and are interested in losing weight quickly with a calm yoga practice, make sure to take a look at our Yoga Fat Loss Bible for Beginners!
-
-
Upward (Reverse) Plank Pose (Purvottanasana)
-
 Plank Pose -Purvottanasana to lose weight")
Begin in the sitting position with your legs out in front of you and your hands placed directly underneath your shoulders. Using your core and your glutes, lift your body up until your pelvis is directly in a straight line with the rest of your body.
Hold this position for 30 seconds.
-
-
-
Half Moon Pose (Ardha Candrāsana)
-
-

Try to stack the hips so that the body is open and pointing outwards, not down towards the mat. Point your right foot out to the side as well, not the floor. If you don’t have the flexibility to reach the floor while keeping your left leg straight, bend the left knee slightly to allow your hand to touch the floor (or use a yoga block).
Other modifications include reaching your right arm towards the floor to help with balance or reaching your left arm to your knee instead of the floor.
Hold for 30 seconds. Perform on both sides.
-
-
-
Side Plank Variation (Vasisthasana)
-
-

Begin in side plank pose with your right hand on the mat directly beneath your right shoulder and your feet at an angle. Slowly reach your right leg around and in front of your right leg. Bend the knee so that it’s at a 90-degree angle.
Reach your left arm towards the ceiling, and let your gaze lift upward.
Hold for 30 seconds. Perform on both sides.
-
-
-
Side Angle Pose (Utthita Parsvakonasana)
-
-

Begin in Warrior I (a lunge position with your left knee bent forward at a 90-degree angle and your right leg straight back with your toes pointed forward). Bend the left elbow and let it rest on the right knee (or reach it down to the ground to increase the stretch). Reach your right arm up behind you, so that it’s in a straight line with your right leg.
Increase the stretch in your side body by reaching out farther through your right fingertips.
Hold for 30 seconds. Repeat on both sides.
-
-
-
Four-Limbed Staff Pose (Chaturanga Dandasana)
-
-

This is a plank variation. Chaturanga is also the yogi pushup.
From plank position, lower your entire body down until your torso is parallel to your upper arms and triceps. Make sure that your butt is lifted a little higher than your torso, and that your belly isn’t sagging. Stay firm.
First, try holding this position for 10 seconds. Work up 30 seconds – 1 minute.
-
-
-
Wheel Pose (Chakrasana)
-
-

This is a more advanced pose (depending on your natural back flexibility), but we wanted to add it in here to help challenge you!
Begin by laying flat on your back with your knees bent and your heels touching your butt. Bend your elbows, and place your palms face down on either side of your head. Gently push yourself up using your arms and your feet.
Be mindful of the elbows. They tend to want to stick out in this position.
Hold it for 30 seconds or as long as you feel comfortable.
-
-
-
Crow Pose (Bakasana)
-
-

This pose is a little more advanced, but it has been included to help you challenge yourself.
Begin in a squatting position on your heels with your hands out in front of you. Come up onto your toes, and place your knees on your upper arms as close to your armpits as possible. Slowly shift your weight forward until your feet come off of the ground and your arms are supporting your weight.
To modify this for beginners, try placing your knees closer to your elbows or even just outside of your elbows.
Hold for 30 seconds or as long as you can.
Remember that for this workout, you will hold each pose for 30 seconds before moving onto the next pose. After all 12 poses have been completed, rest for 1 minute.
Then repeat the workout again, making sure to switch sides on the poses that work different sides of the body. Rest for an additional minute, and complete the poses for the third time.
Feel free to stay in any of the stretches for longer than 30 seconds if it feels good on your body or you think you need it.
Source: avocadu.com